
Need to start accepting bitcoin payments globally through your React application? In this guide, we will work you through how to set up the layment button.
Introduction
To receive safe, mobile and global payments with lesser fees and no chargebacks, bitcoin and lightning payments are the way to go.
Need to start accepting bitcoin payments globally through your React application? In this guide, We’ll be walking through the process of integrating the Bitnob API into your React applications via our react-bitnob payment button.
I’ll be demonstrating this by building a simple e-commerce checkout demo. However, before we get started, here are a few prerequisites.
Prerequisites
These essential prerequisites ensure a straightforward understanding of the integration process, and they include the following;
- A Bitnob Business account - opening a Bitnob account is free and easy to set up. An account is vital for access to a unique public key for our demo. Here is a step-by-step guide on setting up a Bitnob account.
- Basic React knowledge
- An IDE (we’ll be using VS Code for this project, but feel free to use whatever IDE you prefer).
- Basic knowledge of package managers, e.g. npm or yarn.
Project Setup
Now that that’s out of the way let’s get our project up and running!
We’ll start off by creating a React app using create-react-app(CRA). If you already have an up-and-running React project, skip this step and go ahead to this section.
To set up CRA, enter either of the following, depending on your preferred package manager, into your CLI or IDE terminal;
## with npx
npx create-react-app payment-button-test

## with yarn
yarn create react-app payment-button-test

## with npm
npm i create-react-app payment-button-test
After installation, you can now navigate to your project’s directory and open up your project within VS Code with the following commands;
## to navigate to your project folder
cd payment-button-test

## to open your project folder in VS Code from your command line
code .
To start your development server, run the following within your IDE terminal;
## with npm
npm start

## yarn
yarn start
This command should automatically start the server at http://localhost:3000/, and your screen should now look like this;
Building the UI
Now that our app is up and running, we can proceed to build our project’s UI.
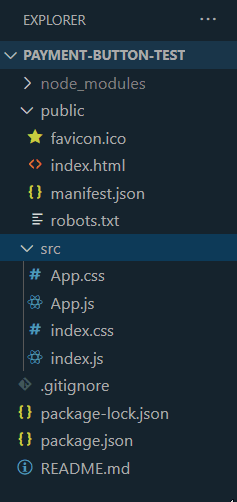
However, before then, go ahead and declutter your project folder by deleting all unnecessary files so it looks something like this;
Moving on, head on over to your App.js file, delete all the pre-written code and populate it with the code below;
function App() {
return (
<div className='App'>
 <header className='App-header'>My Bitnob Store</header>
 <main>
   <div className='img-pricing'>
     <img src='/image.jpg' alt='skincare product' />
     <h2 className='price'>Price: $100</h2>

     <div className='btn__container'>
        <button className='control__btn'>
          +
        </button>
        <span className='counter__output'>0</span>
        <button className='control__btn'>
          -
        </button>
        <button className='reset'>
          Reset
        </button>
        <div className='total__price'>$0</div>
      </div>
   </div>
   <form className='form-container'>
     <div>
       <div className='input-div'>
         <label htmlFor='email'>
           <b>Email</b>
         </label>
         <input
           type='text'
           placeholder='Enter Email'
           name='email'
           id='email'
           required
         />
       </div>
     </div>
   </form>
 </main>
</div>
);
}
export default App;
From the code above, I have a straightforward header for our e-commerce store and a simple email input. I’ve also grabbed a neat sneaker picture from Unsplash as our product image and added it to our public folder. Right below our image, I have hard-coded the amount or pricing (for now), and we’ll fix that in a bit.
I’ve also created three different buttons to increment, decrement or reset the number of items we’ll be purchasing, and two spans; one to show the current item count and another to show the current total amount. Right now, I have hard-coded their value, but we’ll fix that in a bit.
I’ve also imported a really cool font from Google Fonts and added the necessary import links to the head of my `index.html` file.

Head over to your browser; by now, you should see a pretty oversized image on your screen with a rather tiny form input, so let’s go ahead and fix that with some styling.
Styling the UI
Head on over to your App.css file and clear out existing styles.
I’ll be styling with pure CSS for simplicity; however, feel free to go ahead with any styling solution you fancy.
After clearing out old styles, populate the file with the code below;
* {
 margin: 0;
 padding: 0;
 box-sizing: border-box;
}
.App {
 text-align: center;
 font-family: 'DM Sans', sans-serif;
}

.App-header {
 background-color: #282c34;
 display: flex;
 flex-direction: column;
 align-items: center;
 justify-content: center;
 padding: 16px 0;
 font-size: calc(10px + 2vmin);
 font-weight: 700;
 color: white;
}
main {
 margin: 0 auto;
 max-width: 600px;
 border: 1px solid #ccc;
 padding: 3rem 1.5rem;
}
.img-pricing {
 width: 100%;
 margin-bottom: 2rem;
}
img {
 height: 400px;
 object-fit: cover;
 /* aspect-ratio: 1/1; */
}
.btn__container {
 margin-top: 2rem;
}
.control__btn {
 display: block;
 width: 100%;
 padding: 1rem;
 background-color: #282c34;
 color: white;
 font-weight: 700;
 border: none;
 border-radius: 0.5rem;
 margin-bottom: 1rem;
 cursor: pointer;
}
.btn__container span,
.total__price {
 display: block;
 margin-bottom: 1rem;
 color: #282c34;
 font-weight: 500;
 font-size: 1.5rem;
}
.reset {
 background-color: white;
 color: #282c34;
 font-weight: 700;
 padding: 1rem;
 border: none;
 border-radius: 0.5rem;
 margin-bottom: 1rem;
 cursor: pointer;
}
.input-div {
 display: flex;
 flex-direction: column;
 align-items: flex-start;
}
.input-div * + * {
  margin-bottom: 20px;
 }
label {
 margin-bottom: 1rem;
}
input {
 padding: 16px 8px;
 border: 1px solid lime;
 border-radius: 5px;
 width: 100%;
 font: inherit;
}
To begin with, I’ve thrown in a few resets to give us a clean slate to work with, while all the rest of the styles do is;
- add a background color and padding to the header,
- add some padding and border styles to the input,
- add some spacing between the label and input,
- style our buttons,
- resize and contain the image and
- align text.
Now, if we go back to our browser, our app should look like this;
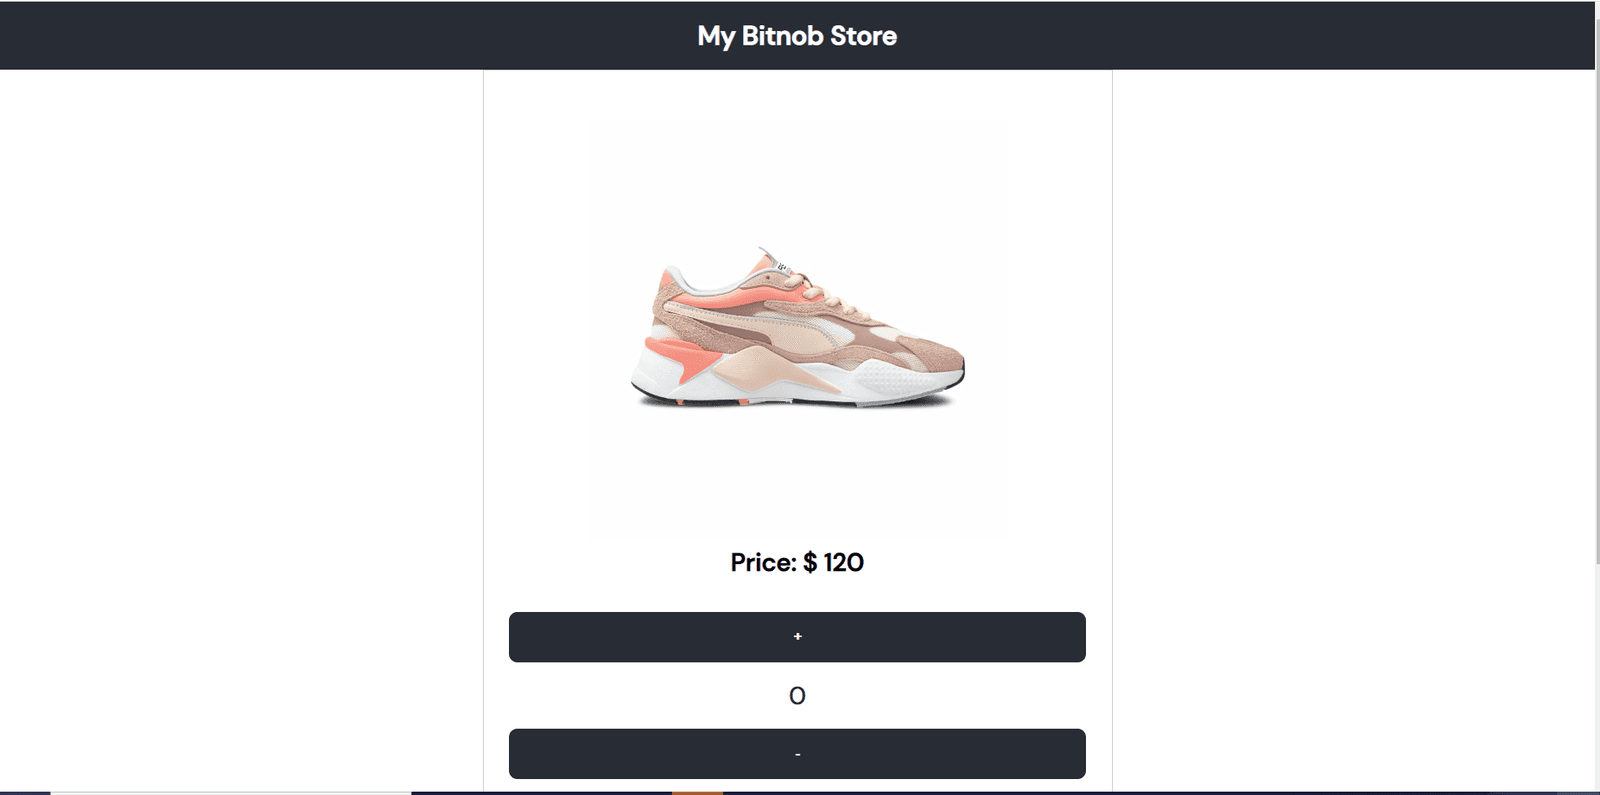
Now that our UI is complete, we can implement our payment logic.
Implementing Payment Logic with react-bitnob
The react-bitnob library is built upon the Bitnob API, which according to the Bitnob documentation,
- ……offers a powerful set of APIs that developers can use to build great products on top of Bitcoin, Lightning, and Stablecoins.
This library provides us with the <PayWithBitnob /> component, a payment button component used to facilitate lightning-fast, global payments in React applications.
How Does The Payment Button Work?
Integrating the <PayWithBitnob /> button into your React application generates a unique checkout pop-up right on your site, allowing customers to scan the available QR code to make Bitcoin or Lightning payments from crypto or lightning-based wallet available to them. This way, customers can make easy payments to your business without leaving your site!
Let’s see this in action.
Installation
We’ll begin by installing the react-bitnob library into our project.
Head on over to your IDE terminal and enter the following installation command;
#with npm
npm i react-bitnob

##with yarn
yarn add react-bitnob
Now that the library has been installed, we can access the <PayWithBitnob /> component.
We can proceed to import the <PayWithBitnob /> component from react-bitnob into our App.js file in this manner;
import { PayWithBitnob } from "react-bitnob";Before we use the button in our application, there are a few things to consider.
The <PayWithBitnob /> Component
The <PayWithBitnob /> component accepts a number of props, some of which you can find on this table.
They are;
- text - this prop takes in the text string you want your button to display.
- publicKey - this prop accepts your Bitnob public key. You can access your public key by opening the “Developer” section of your “Settings” menu on your dashboard and clicking the “API Keys and Webhooks”.
- amount - the amount prop takes in the amount of money you’re requesting from your customer.
- currency - the currency prop takes in the local currency of your business. Check out the list of currencies supported by the Bitnob API here: https://docs.bitnob.com/reference/get-exchange-rates.
- However, for the sake of our project, we’ll be using the USD.
- reference - the reference prop takes in a randomly generated alpha-numeric string to serve as a unique reference ID for each transactions.
- customerEmail - this prop takes in your customer's email to allow them to track transactions and receive receipts.
- notificationEmail - this prop takes in your preferred email for transaction notifications and receipts.
- environment - this prop takes in either of two values;
- sandbox - is the test environment for your application using test data.
- production - is the real-life development environment using live data.
- callbackUrl - this prop takes in the callback URL that will receive webhook events and return information on your transaction. In our project, we’ll use the URL from webhook.site, so head on over and sign up to get your own unique URL.
- successUrl - This is the URL you want to redirect your customers to after successful payment.
To access some of these values, e.g. our email address from the email input, we have to create some variables to hold state.
Writing The Logic
We’ll start by importing useState into our project.
import { useState } from "react";
Then, we can create a few state variables for our amount, email and reference, and two functions; one for our reference and one to submit our form.
  const [referenceID, setReferenceID] = useState("");
  const [email, setEmail] = useState("");
  const [amount, setAmount] = useState("120");
Starting from the reference, we want to create a function that generates a 20-character2-long alpha-numeric string to serve as an id for our transaction. We will call that function handleReferenceID.
 const handleReferenceID = () => {
  var id = "";
    var char = "ABCDEFGHIJKLMNOPQRSTUVWXYZabcdefghijklmnopqrstuvwxyz0123456789";
    for (let i = 0; i < 20; i++)
      id += char.charAt(Math.floor(Math.random() * char.length));
  setReferenceID(id);
  };
What I’ve done above is instantiate an id variable and a global char variable and assign them to an empty string and a long string of alphabets and numbers, respectively. I then created a for loop to pick random characters from my char string and add it to my id variable to form a 20-character-long alpha-numeric string.
I then set the value of the referenceID state to the id variable.
Next, we want to get the value of our email input and add onChange event handlers to change the state in response to user input like so;
<div className='input-div'>
   <label htmlFor='email'>
     <b>Email</b>
   </label>
   <input
     type='text'
     onChange={(e) => setEmail(e.target.value)}
     value={email}
     placeholder='Enter Email'
     name='email'
     id='email'
     required
   />
 </div>
For my amount variable, I’m going to set the state to 120 and replace the hardcoded figure with the state variable.
For our add-to-cart functionality, we’re also going to create three states for the item count and our total price, as well as three functions to increment, decrement and reset our state respectfully.
We can do this like;
// Tracks item count. initial state value is a number.
const [itemCount, setItemCount] = useState(0);
// Tracks total price. Initial state value is a string.
const [totalPrice, setTotalPrice] = useState("0");

  //increase itemCount
  const increase = () => {
    setItemCount((count) => count + 1);
    setTotalPrice((itemCount + 1) * amount);
  };
  //decrease itemCount
  const decrease = () => {
    itemCount > 0 && setItemCount((count) => count - 1);
    setTotalPrice((itemCount - 1) * amount);
  };
  //reset itemCount
  const reset = () => {
    setItemCount(0);
    setTotalPrice(0);
  };
We can then assign these functions to onClick events on the appropriate buttons, and replace our hard-coded values with itemCount and totalPrice like so;
<div className='btn__container'>
     <button className='control__btn' onClick={increase}>
       +
     </button>
     <span className='counter__output'>{itemCount}</span>
     <button className='control__btn' onClick={decrease}>
       -
     </button>
     <button className='reset' onClick={reset}>
       Reset
     </button>
     <div className='total__price'>$ {totalPrice}</div>
   </div>
Finally, to handle form submission, we can create a handleSubmit function like so;
  const handleSubmit = (e) => {
    e.preventDefault(); ## prevent default form action
    handleReferenceID(); ## create a new reference on form submission
    setEmail(""); ## clear input field after submission
  };
Now, adding our payment button, the code in your App.js file should look like this;
import "./App.css";
import { useState } from "react";
import { PayWithBitnob } from "react-bitnob";
function App() {
  const [referenceID, setReferenceID] = useState("");
  const [email, setEmail] = useState("");
  const [amount, setAmount] = useState("120");

  const handleReferenceID = () => {
  var id = "";
    var char = "ABCDEFGHIJKLMNOPQRSTUVWXYZabcdefghijklmnopqrstuvwxyz0123456789";
    for (let i = 0; i < 20; i++)
      id += char.charAt(Math.floor(Math.random() * char.length));
  setReferenceID(id);
  };

  const handleSubmit = (e) => {
    e.preventDefault();
    handleReferenceID();
    setEmail("");
  };

return (
<div className='App'>
  <header className='App-header'>My Bitnob Store</header>
  <main>
    <div className='img-pricing'>
      <img src='/sneakers.jpg' alt='sneakers' />
      <h2 className='price'>Price: $ {amount}</h2>

      <div className='btn__container'>
        <button className='control__btn' onClick={increase}>
          +
        </button>
        <span className='counter__output'>{itemCount}</span>
        <button className='control__btn' onClick={decrease}>
          -
        </button>
        <button className='reset' onClick={reset}>
          Reset
        </button>
        <div className='total__price'>$ {totalPrice}</div>
      </div>
    </div>
    <form onSubmit={handleSubmit} className='form-container'>
    <div>
      <div className='input-div'>
        <label htmlFor='email'>
          <b>Email</b>
        </label>
        <input
          type='text'
          onChange={(e) => setEmail(e.target.value)}
          value={email}
          placeholder='Enter Email'
          name='email'
          id='email'
          required
        />
      </div>
   // we're conditionally displaying the button only if we have an amount and email
   {amount && email && (
     <PayWithBitnob
       text='Pay with Bitnob'
       publicKey='pk.9058f.0a5cb70de0f5853b9febfa'
       customerEmail={email}
       notificationEmail="bitnob@gmail.com"
       amount={totalPrice} // total price we're to pay.
       currency='USD'
       reference={referenceID}
       environment='sandbox' // test environment
       callbackUrl='https://webhook.site/42e92a2a-ee0c-4192-85d4-63de8b1a2867'
            // unique URL gotten from webhook.site
       successUrl='http://localhost:3000/'
            // on success, we want to redirect the user back to our page
     />
 )}
   </div>
  </form>
 </main>
</div>
);
}
export default App;
Check out the code and live demo of this project here.
Testing Payments
Go ahead and fill in your email and click the payment button. You should see the checkout pop-up on your screen. Copy the lightning address on the pop-up; that’s what we’ll use to test our payment.
To test payments in our sandbox environment, head on over to htlc.me and sign up to get a fast and easy wallet. We will use this wallet to make payments to our store.
After signing up, click on the “Send” tab, and a lightning request input should appear. When it does, paste in your lightning invoice and click “Pay”.
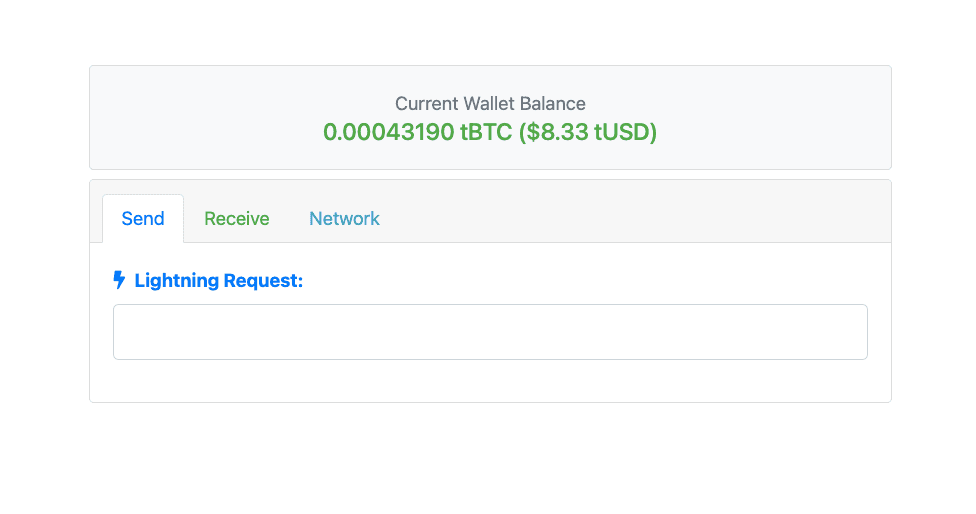
…and voila! Payment successful!
Payment Verification and Redirect
After payment, head over to your application, by now, the pop-up should be gone, and you should be redirected to your page or whatever URL you set as your successUrl.
By now, your test customerEmail should have received their transaction receipt via mail.
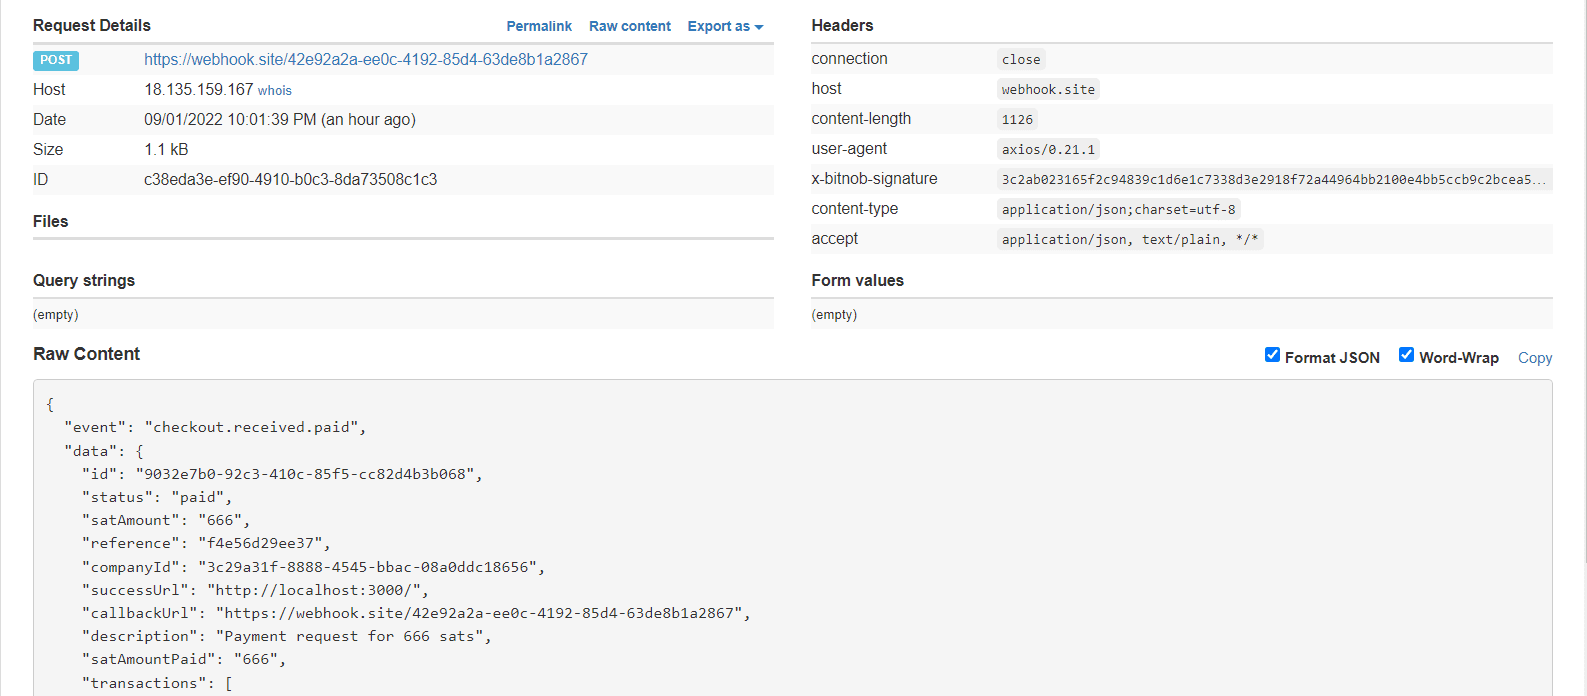
For more information on your transaction, you may check your webhook.site(where we got our callbackUrl) dashboard for full details on your transaction, including the webhook events.
According to the Bitnob documentation,
- “…all webhook events should be verified to ensure that these webhooks are from Bitnob before performing any action.”
Here’s a sample of what you should be looking out for;
Conclusion
Bitcoin payments have never been easier. With even lesser fees, get bitcoin and lightning payments from any customer around the world. A simple implementation of the Payment Button in your React application is all you need to receive global payments without your customers ever leaving your site!
Check out the full code and live demo for this project here.
For more information on the Payment Button, check out our docs here.